Bunk bed with no screws
Project timeline:
- 03/10/2019 Instruction manual is finally complete!
- 01/07/2018 As a Christmas present (Orthodox), the project is open-sourced, and released for public's enjoyment and participation in a form of a micro-site. More info: www.freebunkbed.org.
- 11/08/2017 Life size beta is cut out with the help of Gian Pablo at his Treasure Island workshop.
- 1/24/16 Initial idea built out in Tinkercad and 3D printed as a scale model for testing purposes.
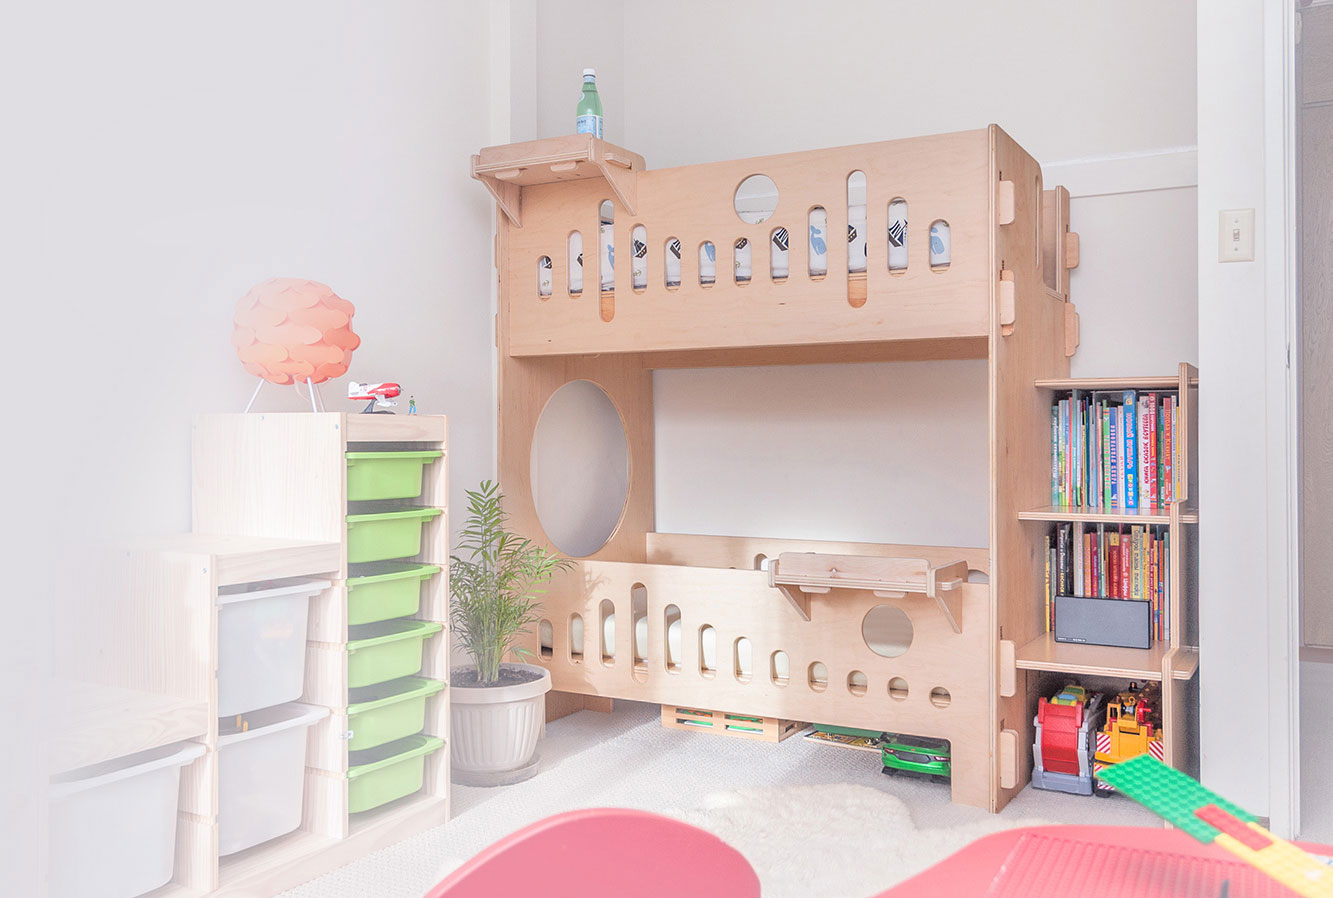
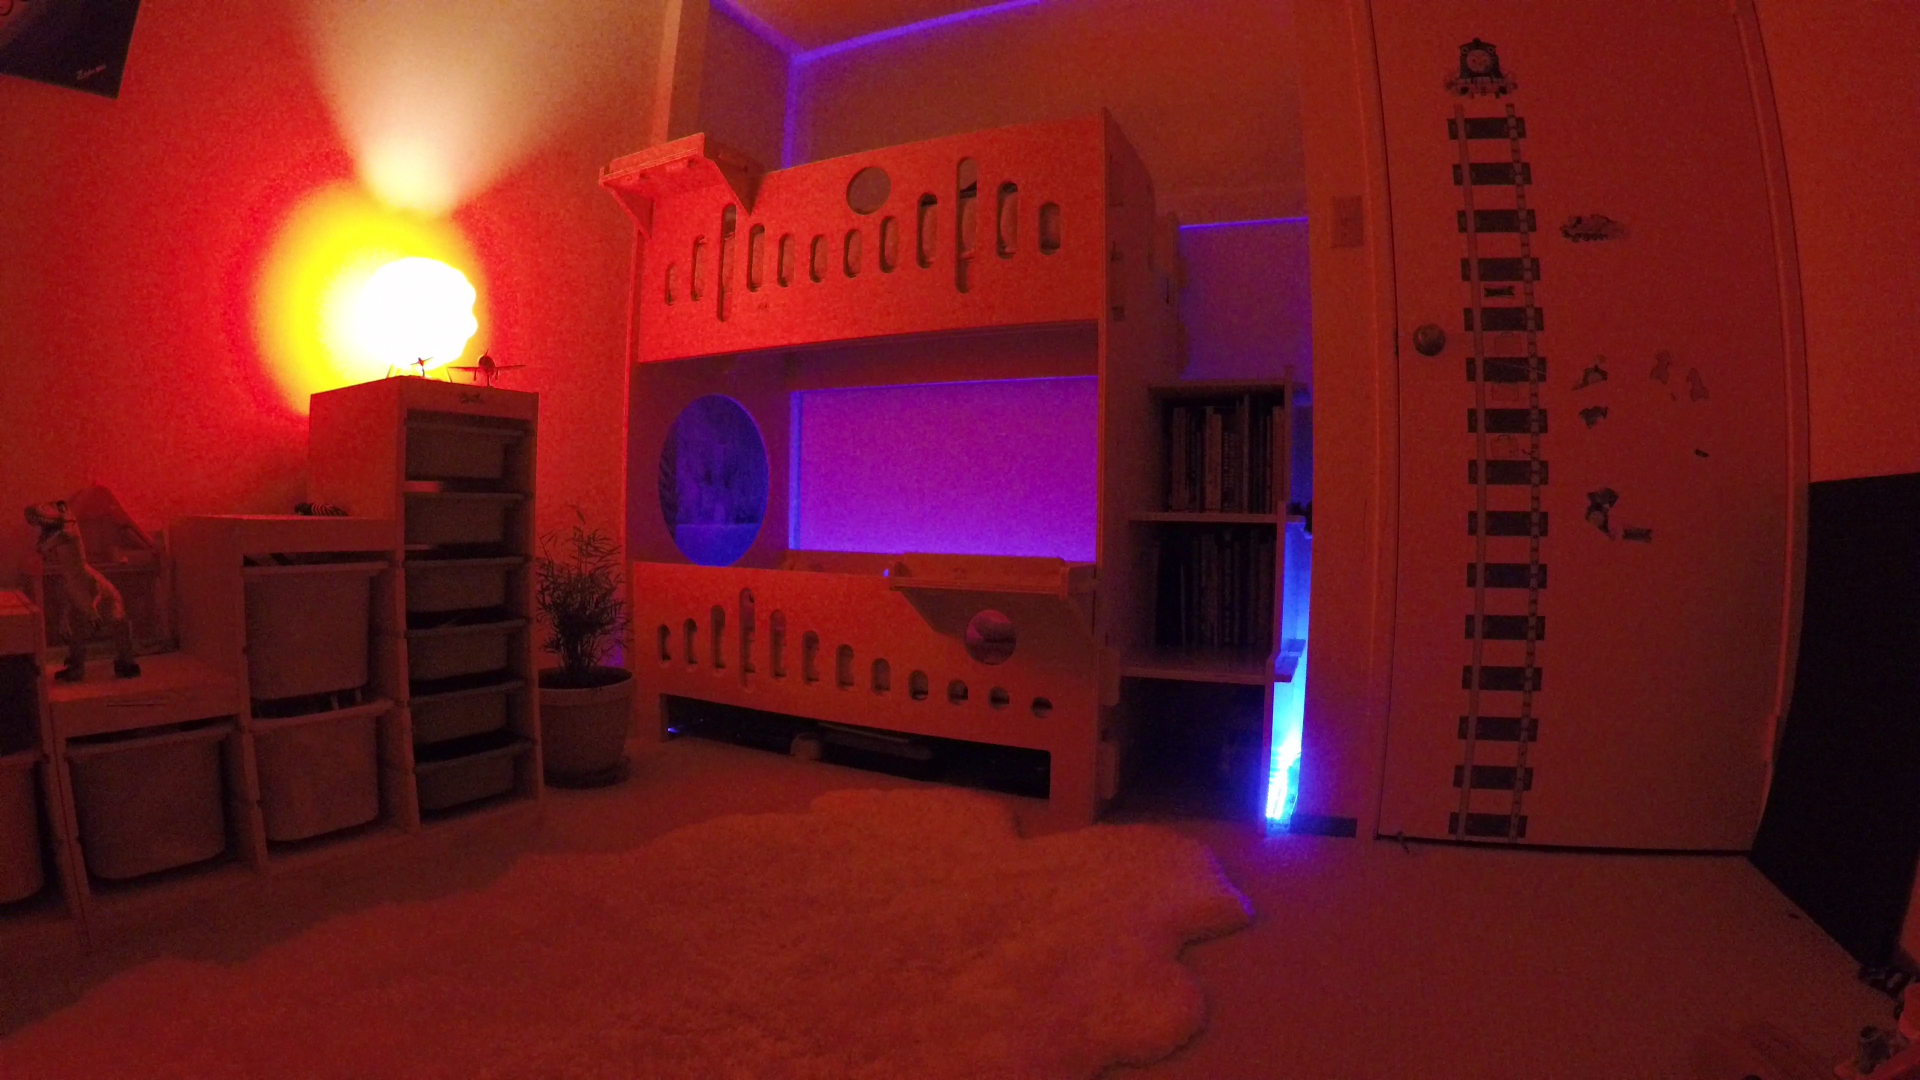
It is official! After two years in the making, the bunk bed project has been brought to completion – and it turned out even better than I imagined it!
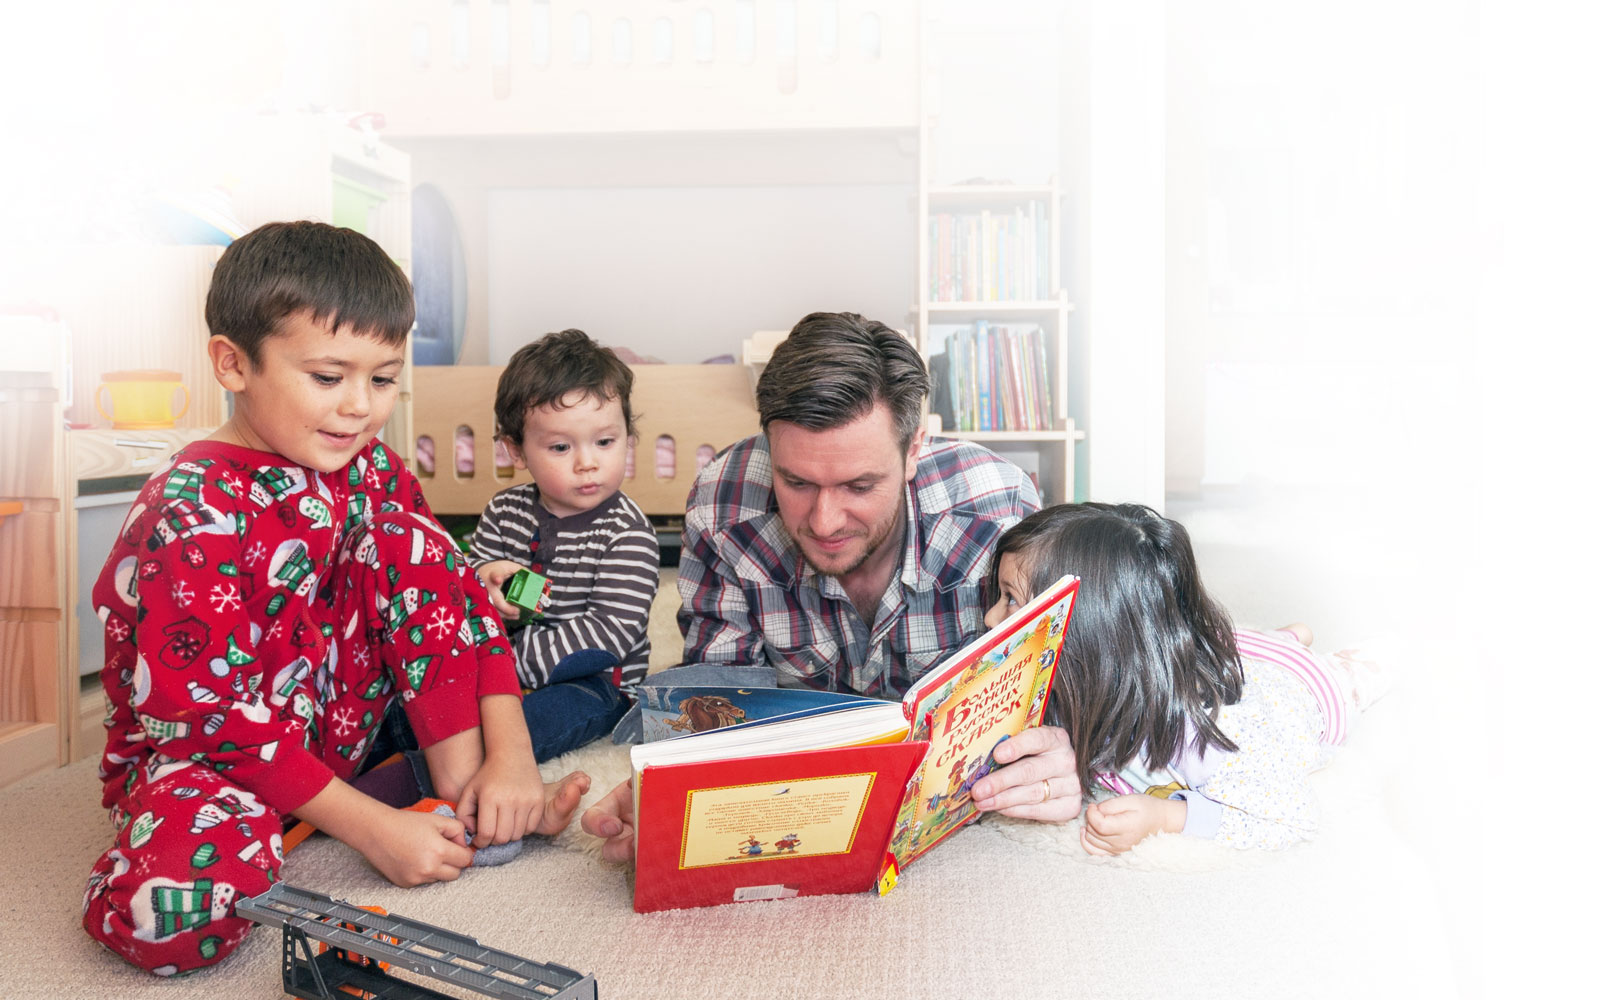
As the end of 2017 was approaching, my wife and two of our youngest kids left for an extended trip to the beautiful Kyrgyzstan, which gave Danil (5) and I a fantastic opportunity to start new projects and finish a few outstanding ones. So, as a surprise, we've decided to do a full kids room makeover by finally removing the two standalone cribs and replacing them with a single bunk bed… and what a difference did this make! The room opened up right away. This freed up a lot of extra play space, so the 3-seat LEGO table has finally returned back into the room again.
Initially I had planned to use a ShopBot found at Pier 9 to do all the cutting, however ever since the opening, the pier has been getting progressively more regulated, so the CNC crash-course has been extended to a far longer period of time than I would want to dedicate to it. The true 'maker' nature has been slowly fading away… What hasn't, are the friendships which the pier has helped to form since day one.
Bay area is all about connections, which is why it is always a good idea not to “burn any bridges”, so to speak. Knowing the right people can really provide for a wonderful life around here! And so I couldn't have thought of a better person to ask for help in finishing the bed than my good, ex-Autodesk friend, Gian Pablo, who happened to have a shop in one of the coolest areas of San Francisco – the Treasure Island!
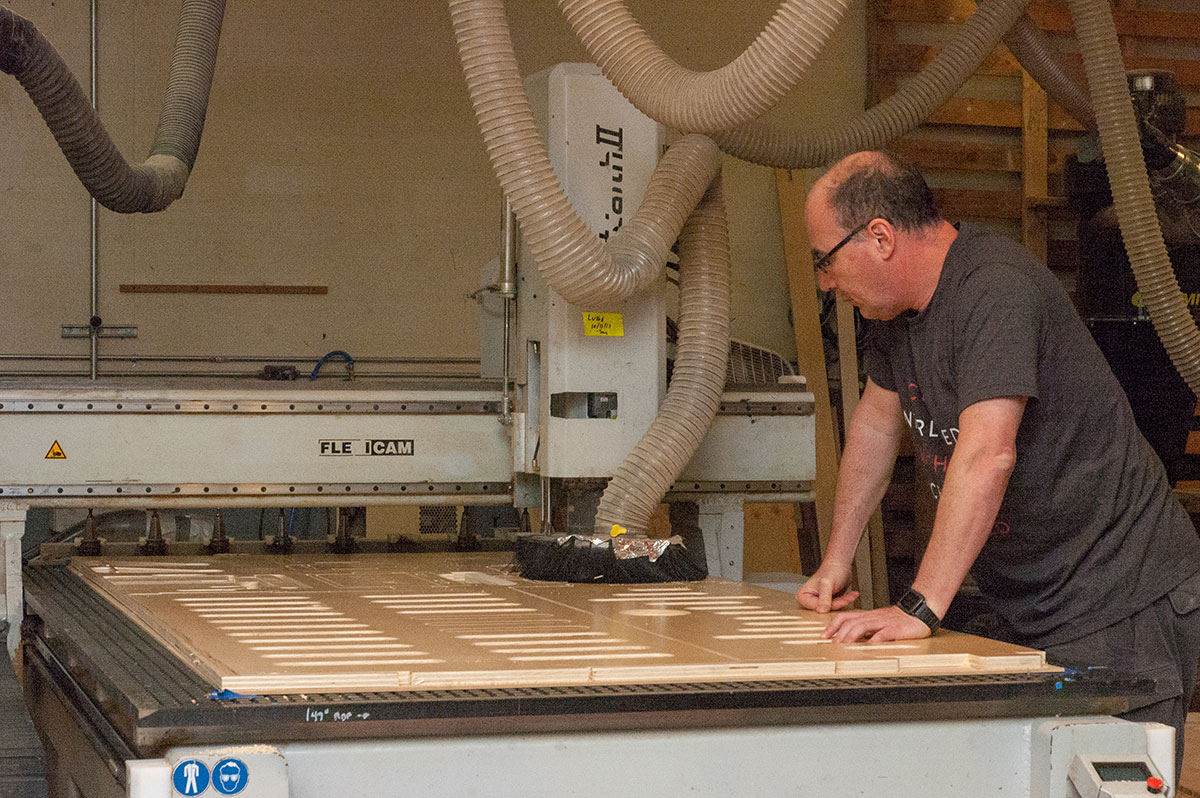

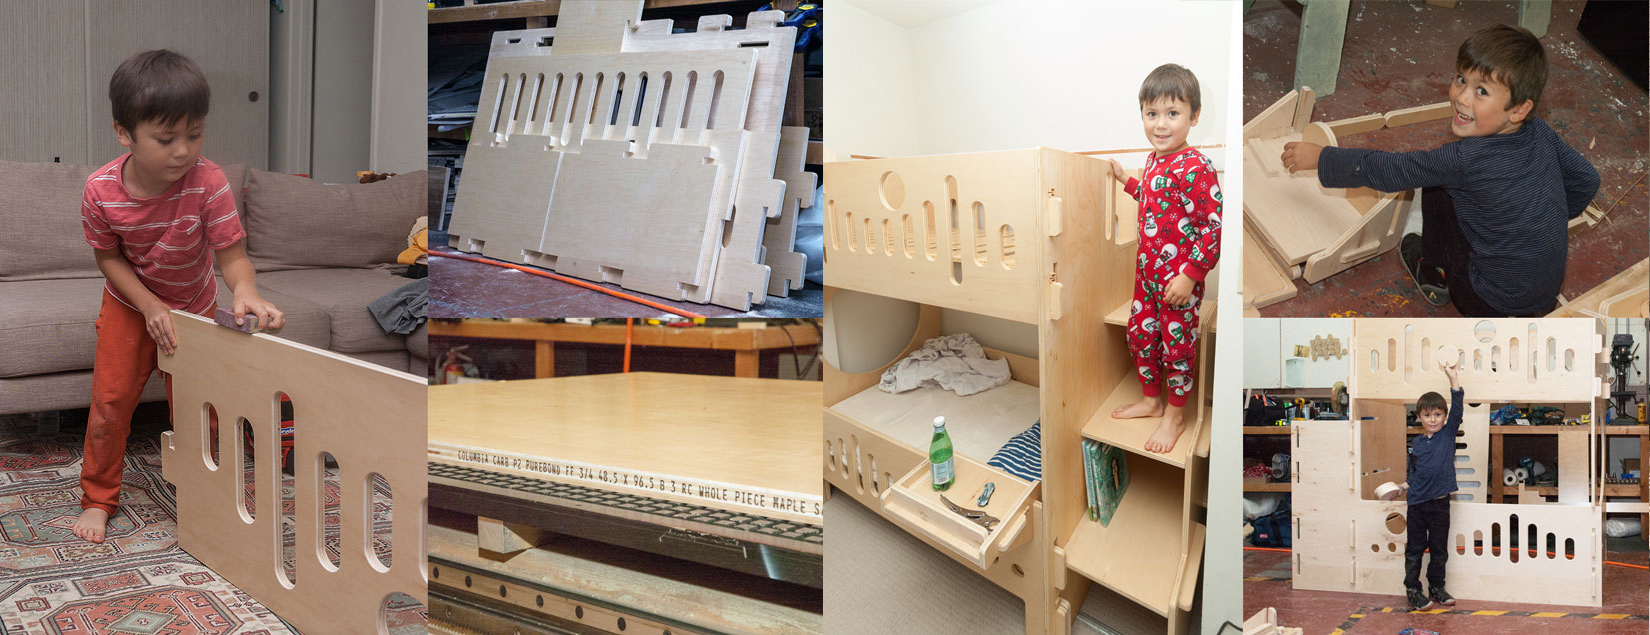
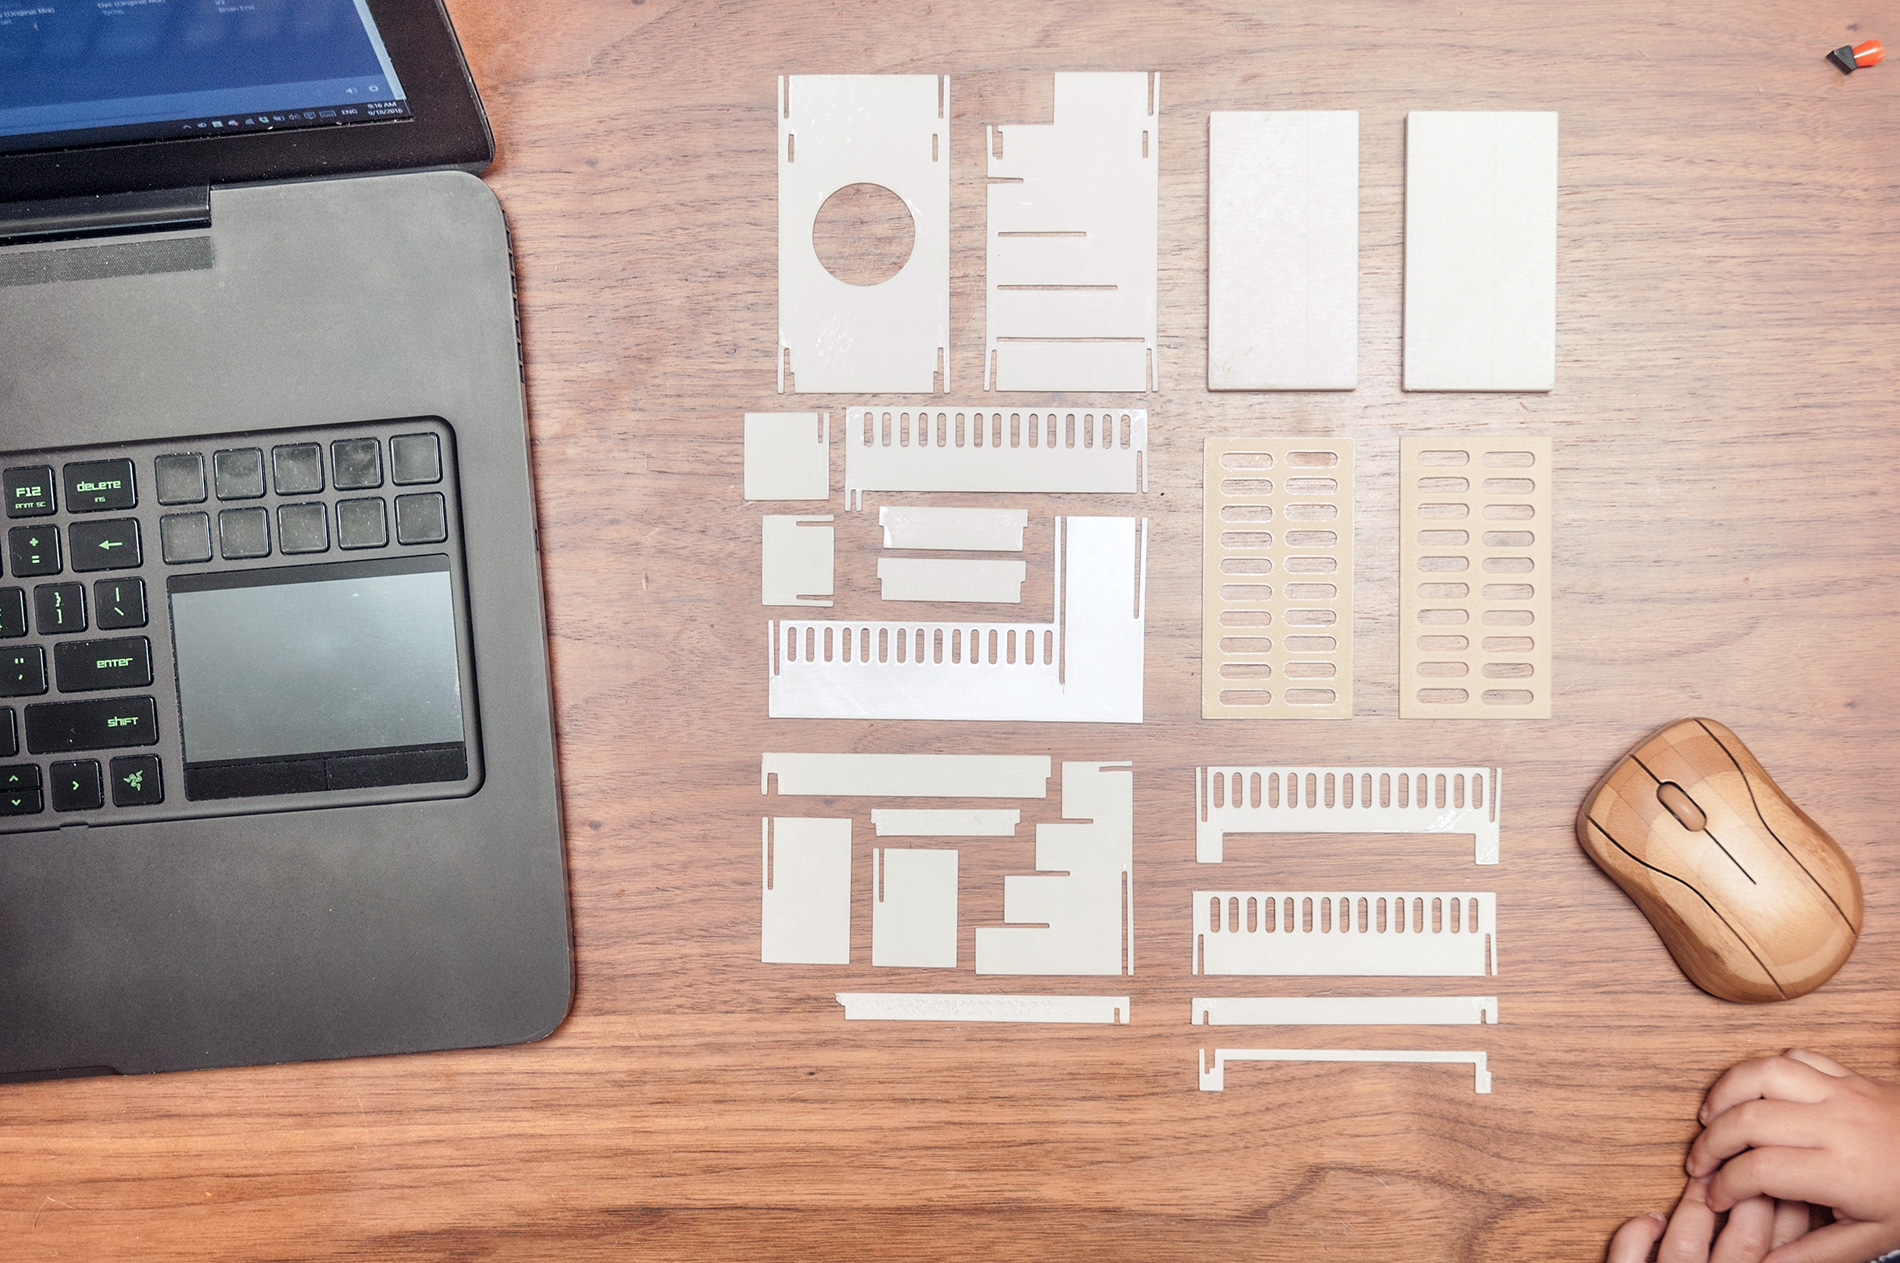
We had a quick chat where I've presented the below scale model of the bed, explained the thinking behind the design, and narrowed down on the material which the bed would eventually be cut out of. Next two days would be spent on cutting (2-4 hours), and finishing (rounding all the edges, sanding, staining, etc took about 10 hours).
I've been working on this project in my spare time for the past two years. It started off as a simple Tinkercad prototype which was printed as a scale model on a MakerBot Replicator 2 for testing purposes. The idea worked great, however development was put on hold. Project finally resumed at the end of 2017 when the family grew yet again and the kid's room required a makeover.
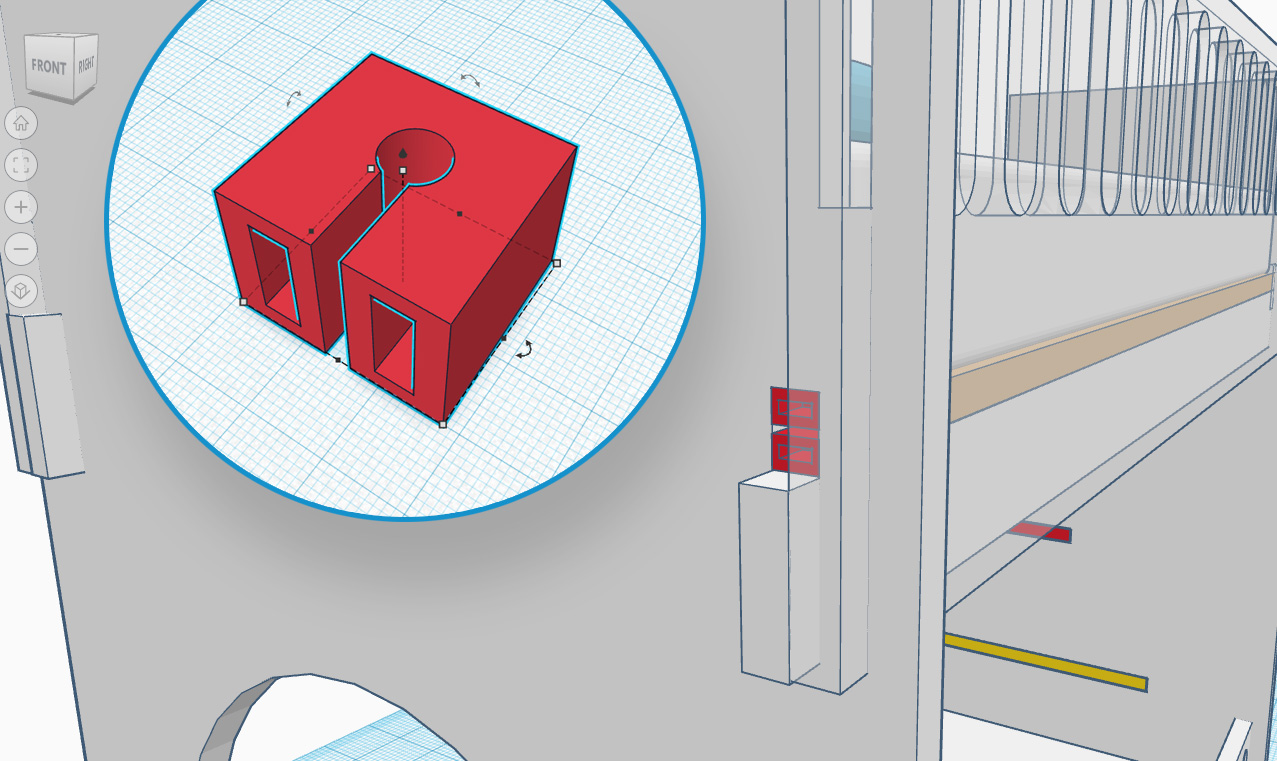
Alpha design, created with Tinkercad and printed on a MakerBot Replicator 2.
A common pattern when thinking about furniture design is using screws/bolts to fasten things. This got me thinking if there was another way, a way which requires no fasteners – just simple design thinking.
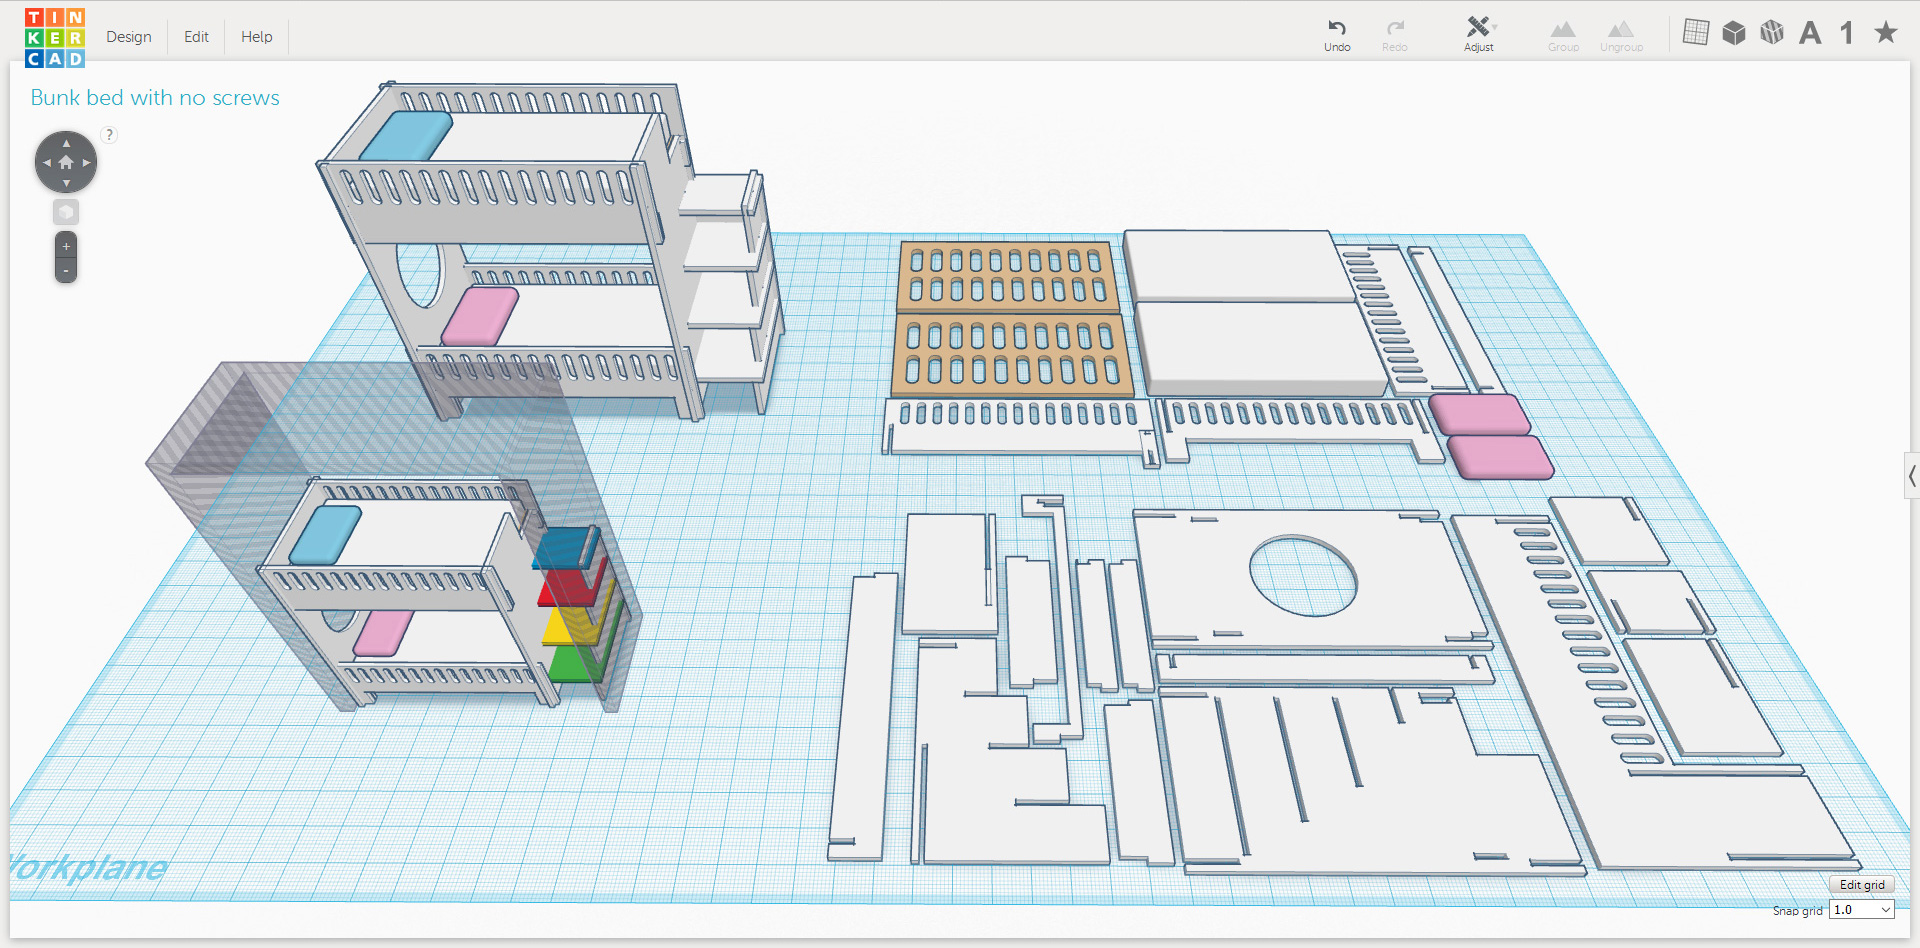
Tinkercad, the free, online 3D design and 3D printing browser app was used to create the initial concept. Note the size of the enclosure the bed must fit into in the bottom left-hand corner of the workplane.
The bed was designed around three main constraints:
- the mattress size (52"×28"),
- tight space the structure must fit into (72" in length) – with 1/4" of clearance on each side, and
- ability to be cut out of freely-available materials – a standard 3/4"×4'×8' panel was selected.
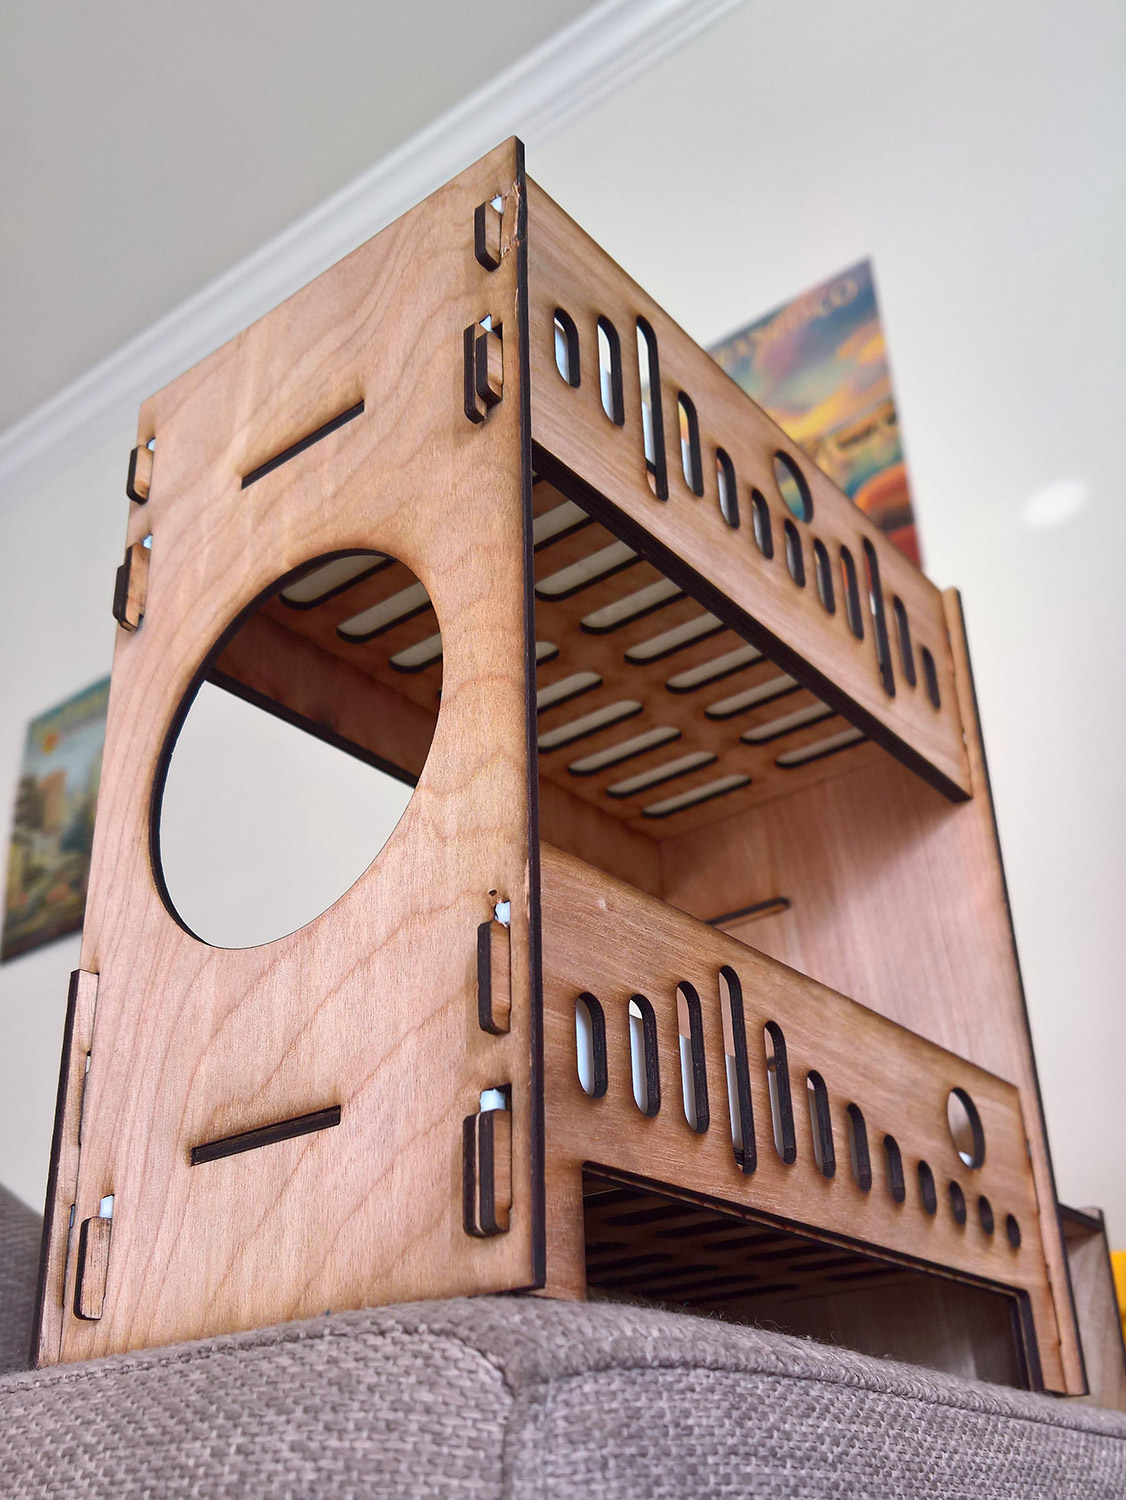
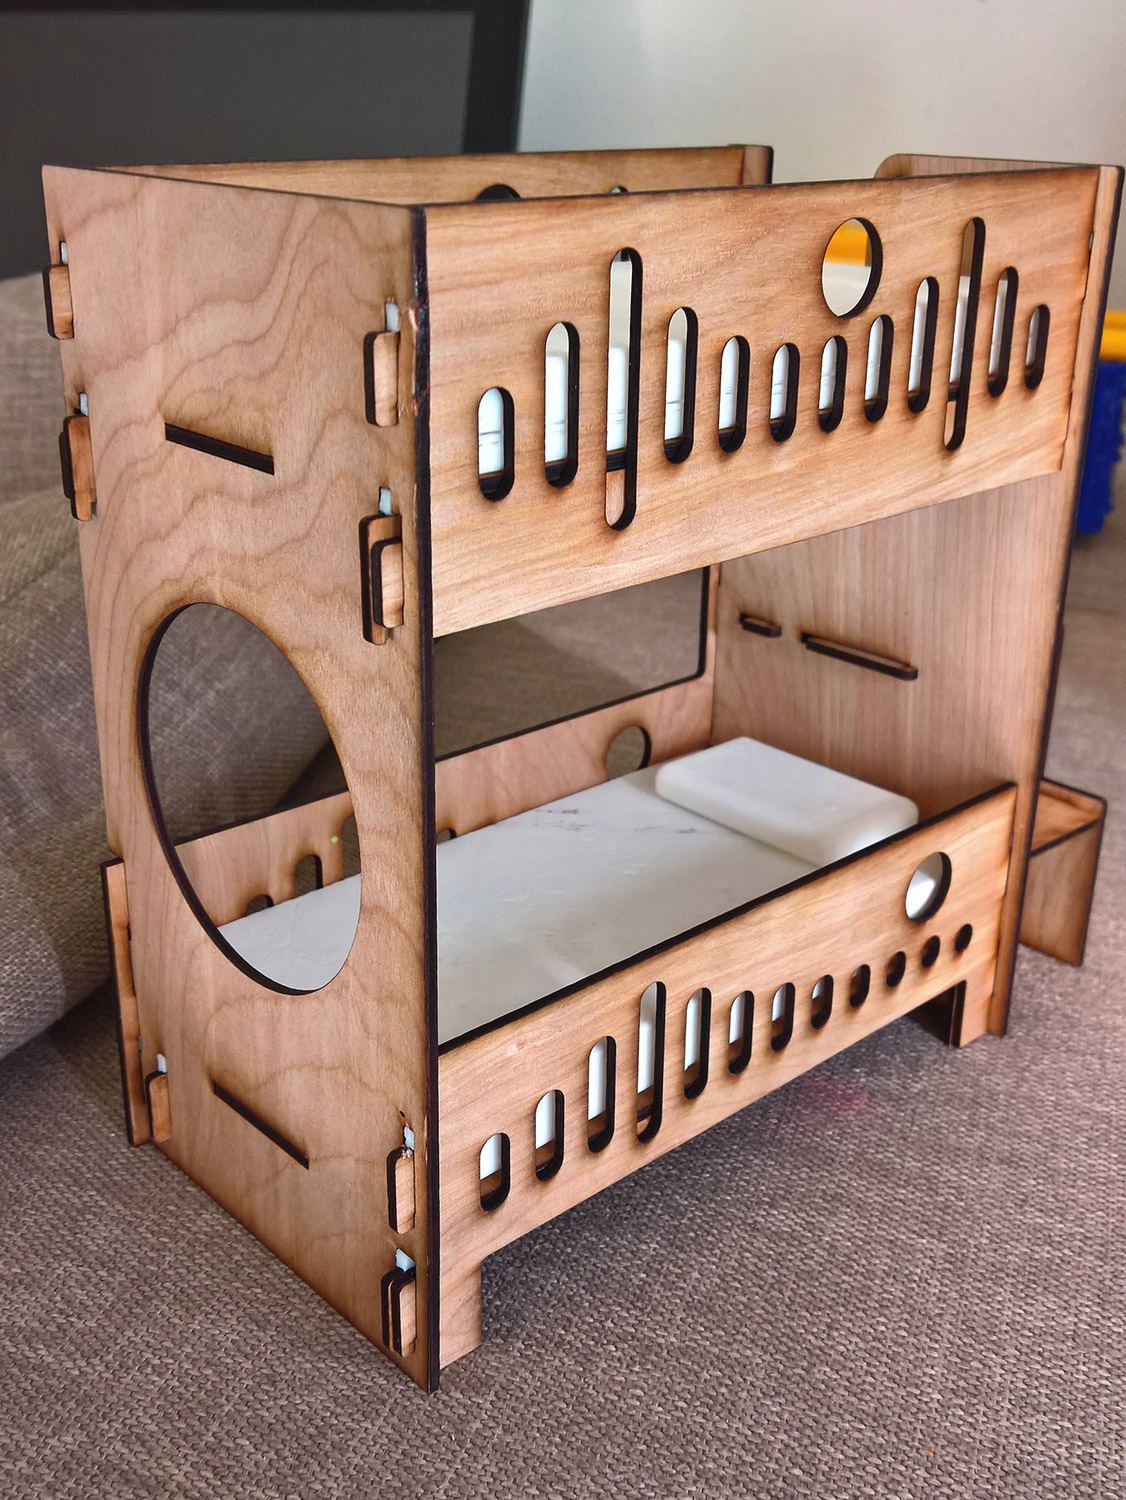
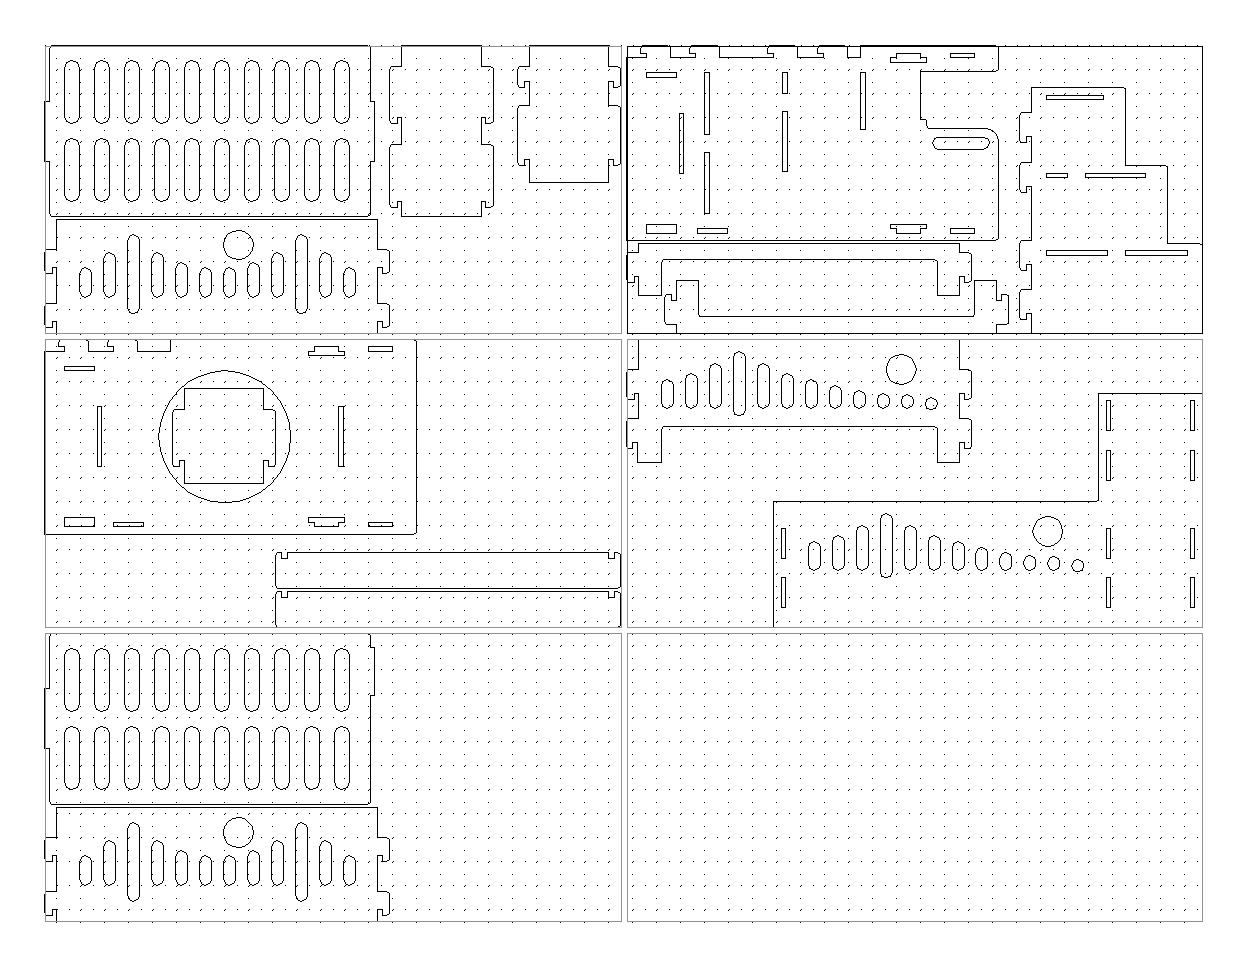
Final design which was laser cut at Autodesk's Pier 9.
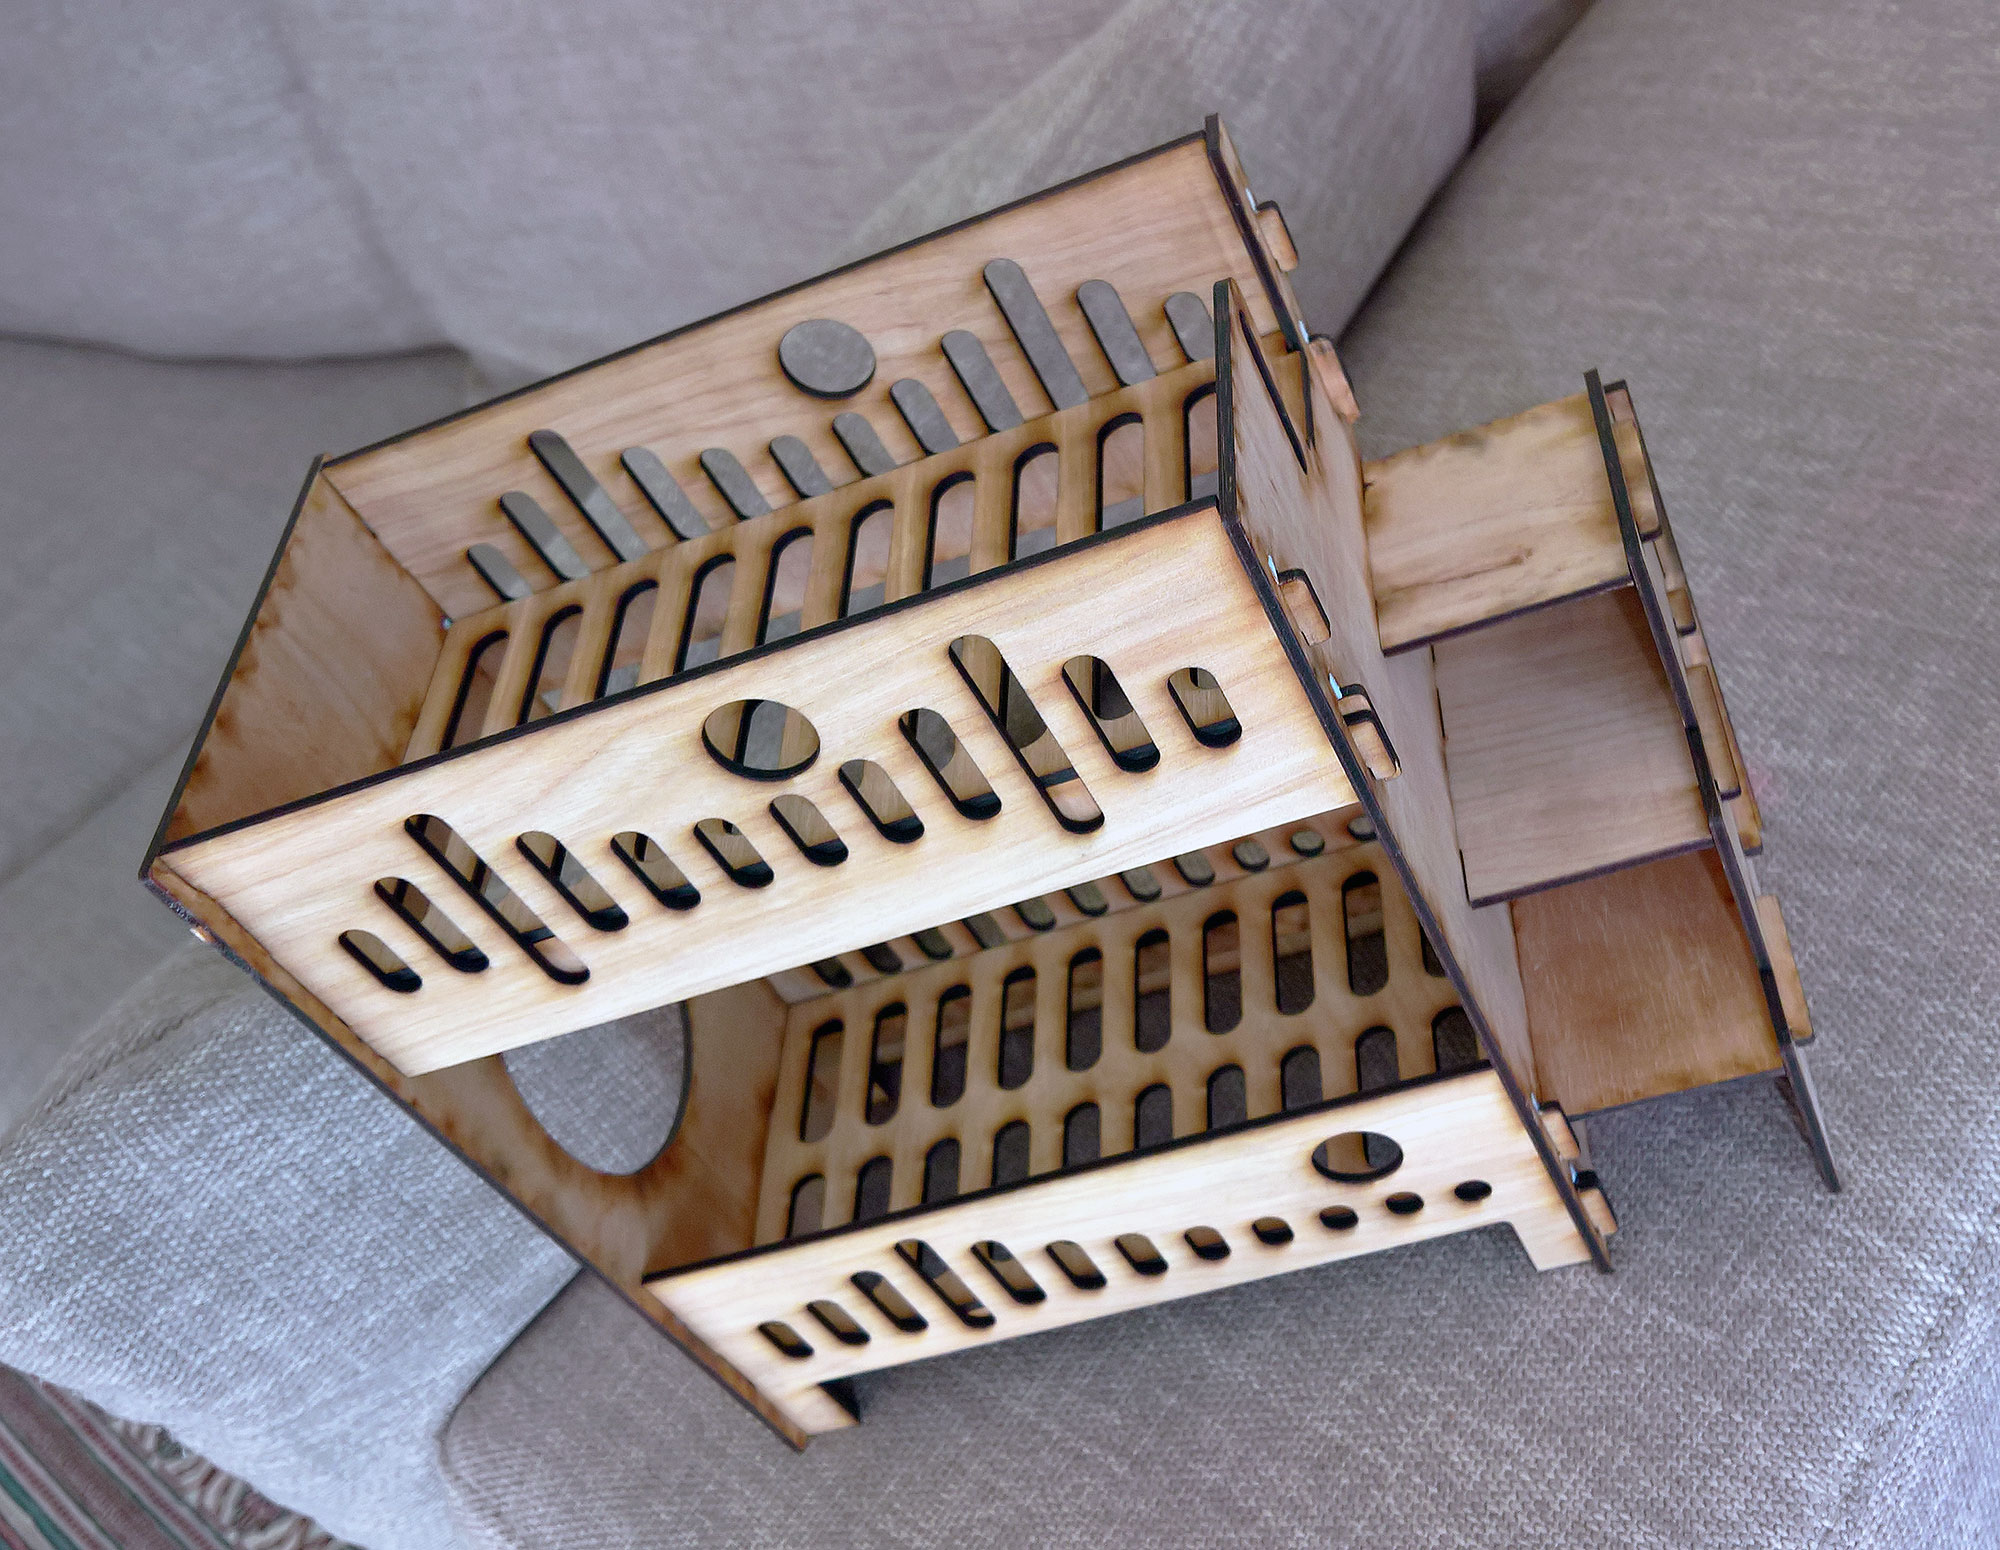
I wanted to cut out as little material as possible out of the side panels to keep them as strong as possible, I wanted to be sure it’s the safest it can be for kids. To commemorate the location of where this bed was designed, the top panel actually resembles Golden Gate bridge – the first bridge you see as you enter the Bay, and the oldest one, just like my oldest son (where he sleeps). Bottom one is the newest portion of the Bay Bridge – it is elegant and not as old as GG bridge, just like my younger daughter.

The beauty of this idea, however, is that one could truly customize their bed with everything from child names, to other, more complex/intricate designs. I wanted to keep with the super minimalist style for v1.
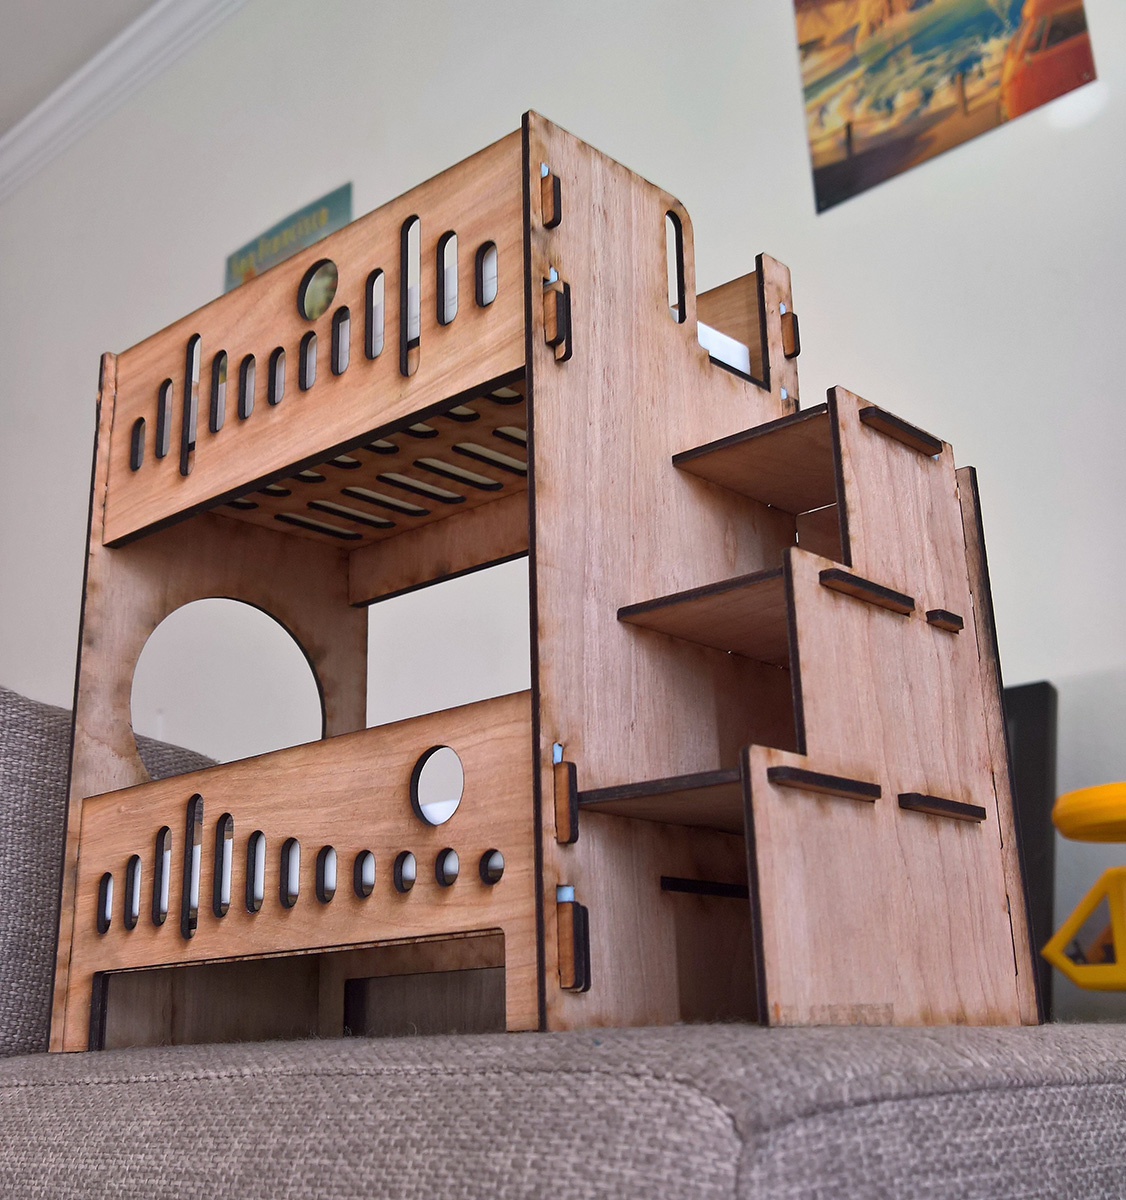
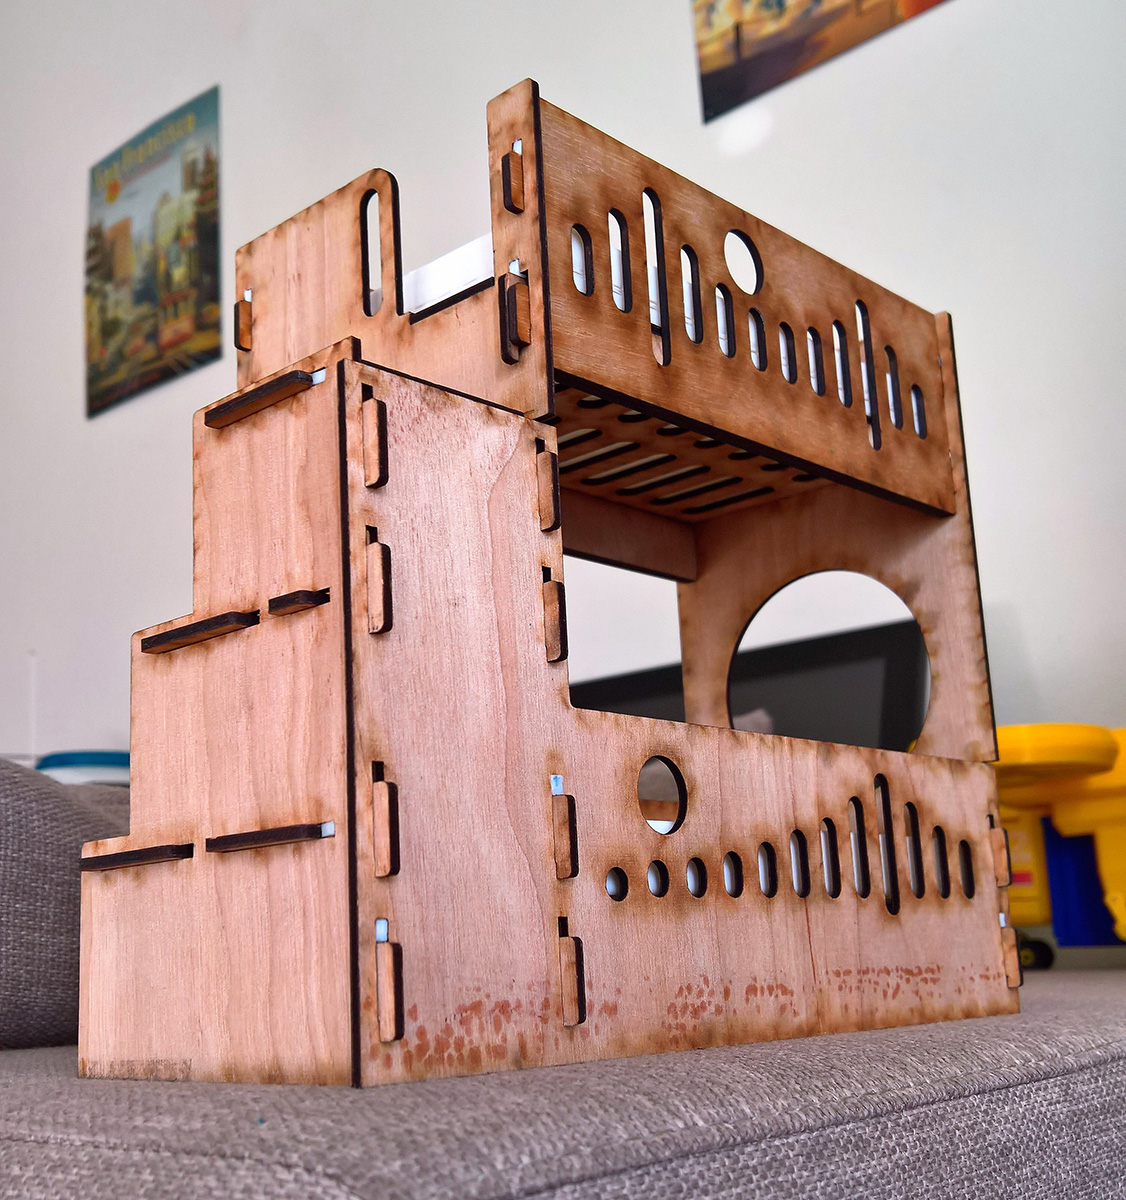
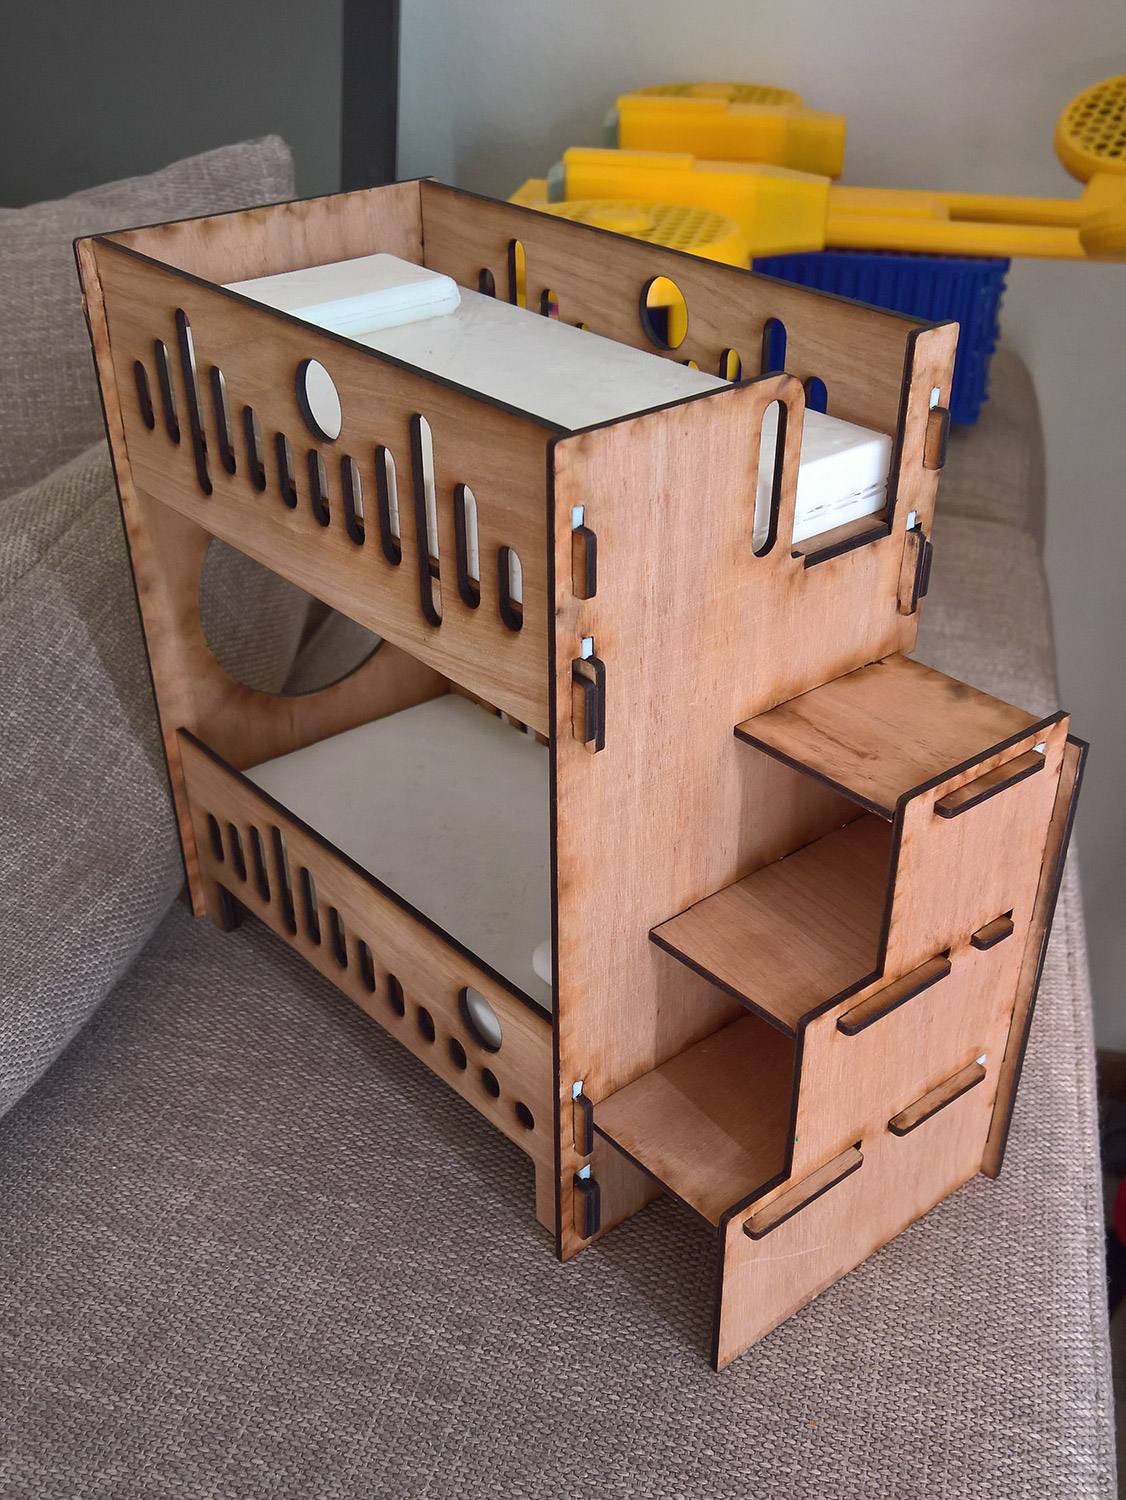
Another added bonus of this design is that unlike most bunk beds on the market, it can be easily mirrored, meaning you could have the steps either on the left or the right side… Speaking of stairs, they were integrated for extra storage (can fit 12" books standing upwards) and at the same time greatly increase the overall strength of the bed structure.
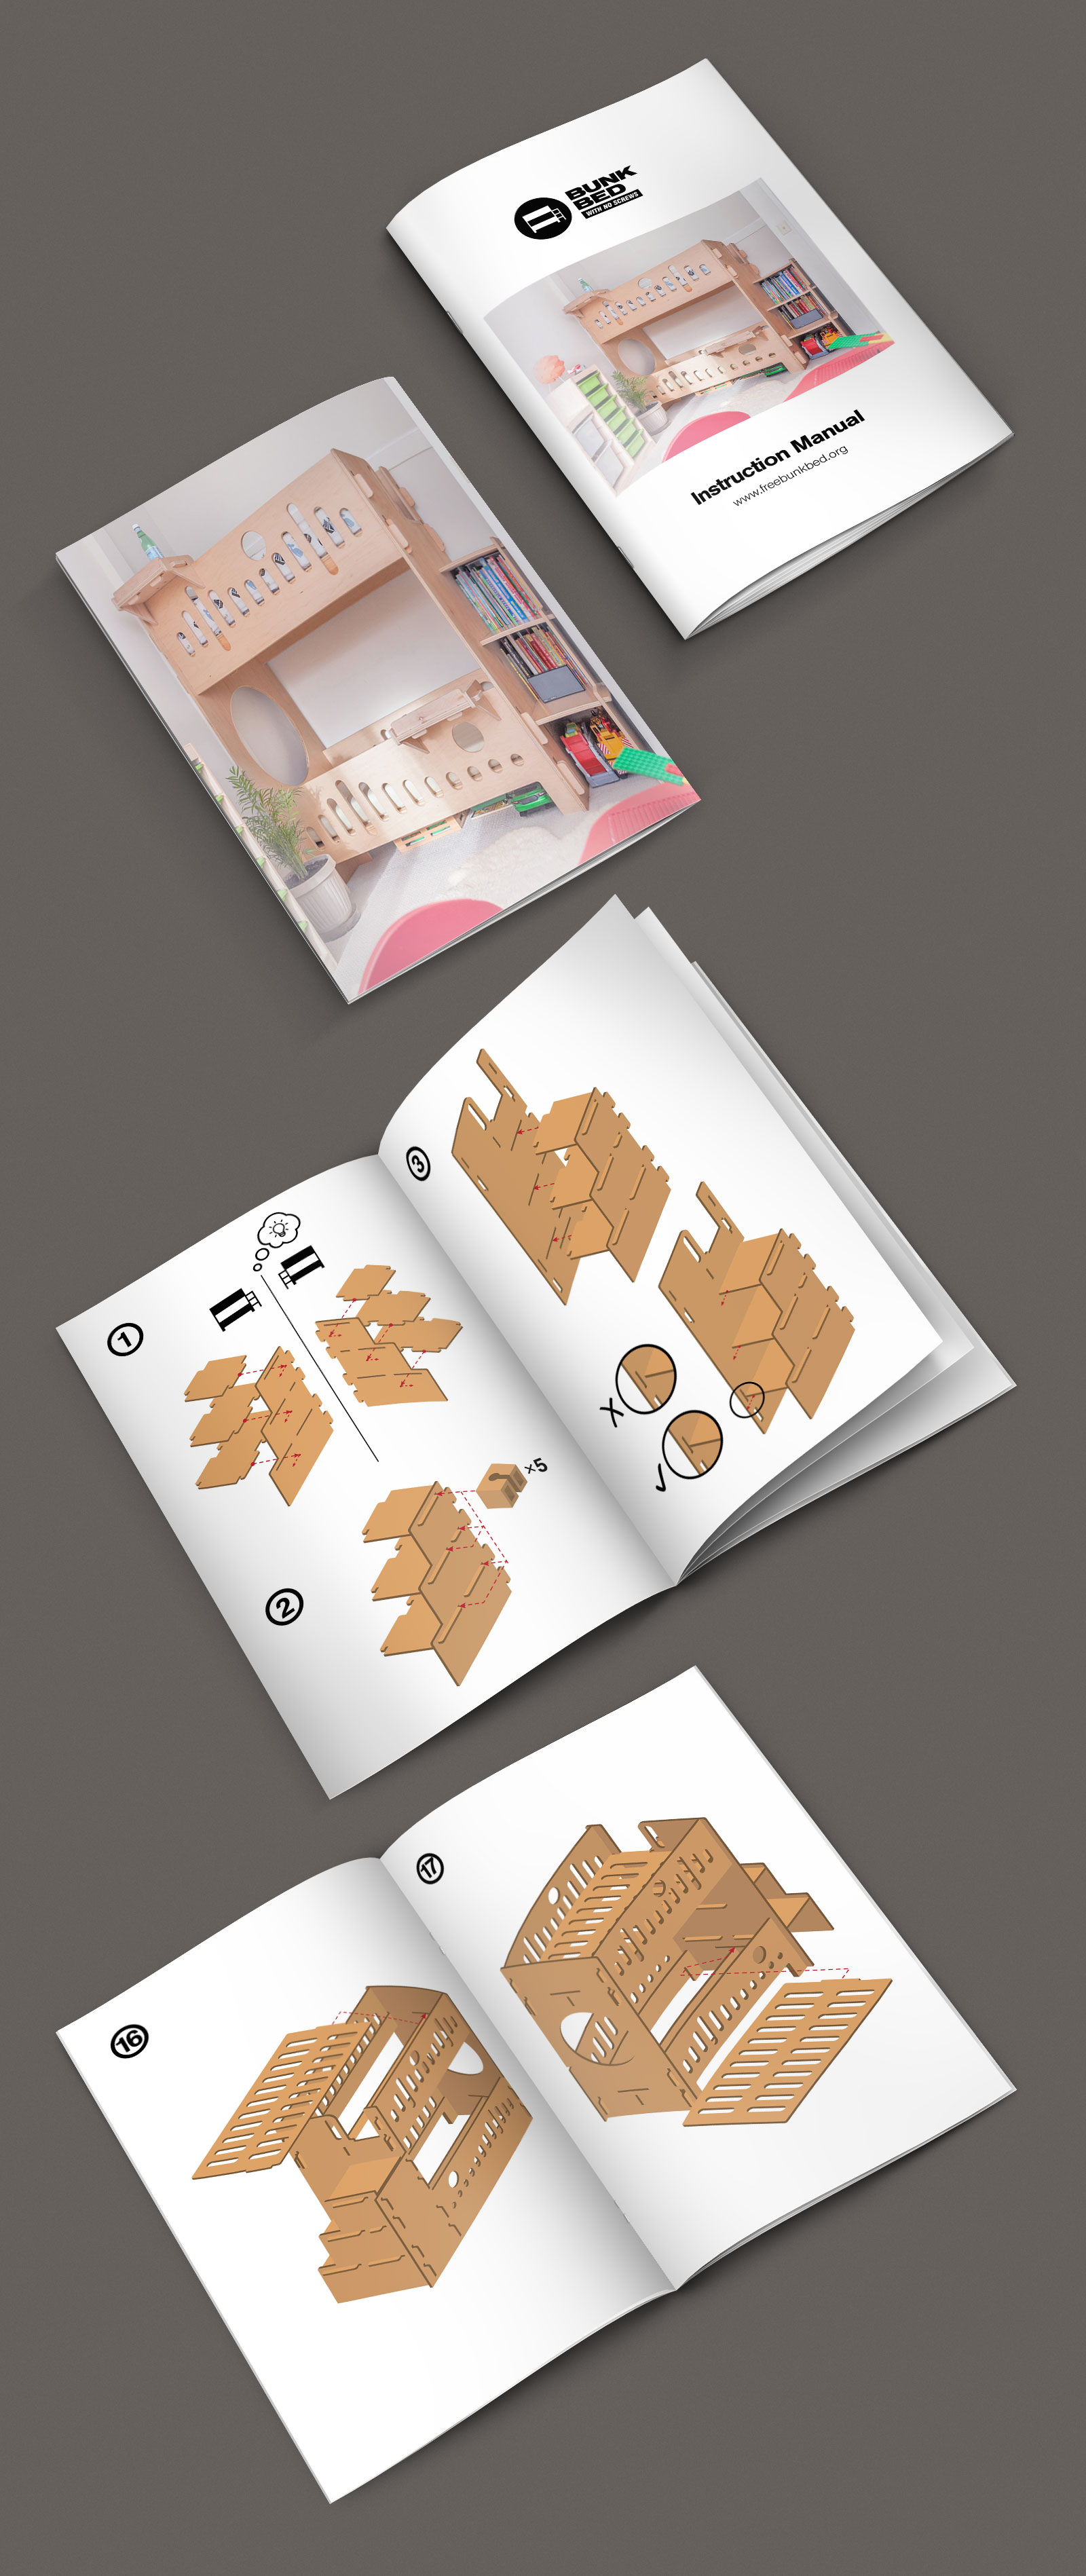
You would also be pleased to know that the assembly of this bed requires absolutely no tools; only the disassembly requires pliers (for safety reasons).
Now, unless you go out of your way to try and disassemble the bed, it will stay in-place without any problems. That might not be the case with kids, however. My children dismantle anything and everything, so it was important to add an extra safety layer. In the spirit of not using any type of common fasteners (bolts, screws), as well as the open design nature, I've designed a simple locking mechanism which can be easily 3D printed on any 3D printer.
Speaking of safety, the bed has been designed with the following in mind:
- Guardrails on both sides of the upper bunk, except for up to 15 inches at each end of the bed.
- The upper edge of the guardrails shall be no less than 5 inches above the top surface of the mattress when a mattress of the maximum thickness (of 7" in this case) specified by the bed manufacturer’s instructions is on the bed.
- Guardrails shall be attached so that they cannot be removed without either intentionally releasing a fastening device or applying forces sequentially in different directions.
- That openings in the structure surrounding the upper bunk be small enough to prevent passage of a tapered block having a base measuring 3.5 inches by 6.2 inches.
- That openings in the end structures and the FHSA rule addresses hazards associated with bunk beds intended for use by children.
The rules are issued under both the Federal Hazardous Substances Act (FHSA), for bunk beds intended for use by children, and the Consumer Product Safety Act (CPSA), for bunk beds not “intended” for (but often used by) children. These rules came into effect on June 19, 2000 and apply to all bunk beds manufactured in the United States, or imported.
Visit www.freebunkbed.org for more.
![]()
Enjoyed what you saw? Stay updated by following me.